Custom block category creation in Gutenberg is a powerful way to organize and streamline your WordPress editing experience. By creating a custom category, you can group related blocks, making finding and using them easier. This not only enhances your workflow but also improves the overall user experience.
First, let’s understand why you might need a custom category. As you add more blocks to your Gutenberg editor, it can become cluttered and challenging to navigate. Therefore, organizing blocks into categories can save time and reduce frustration.
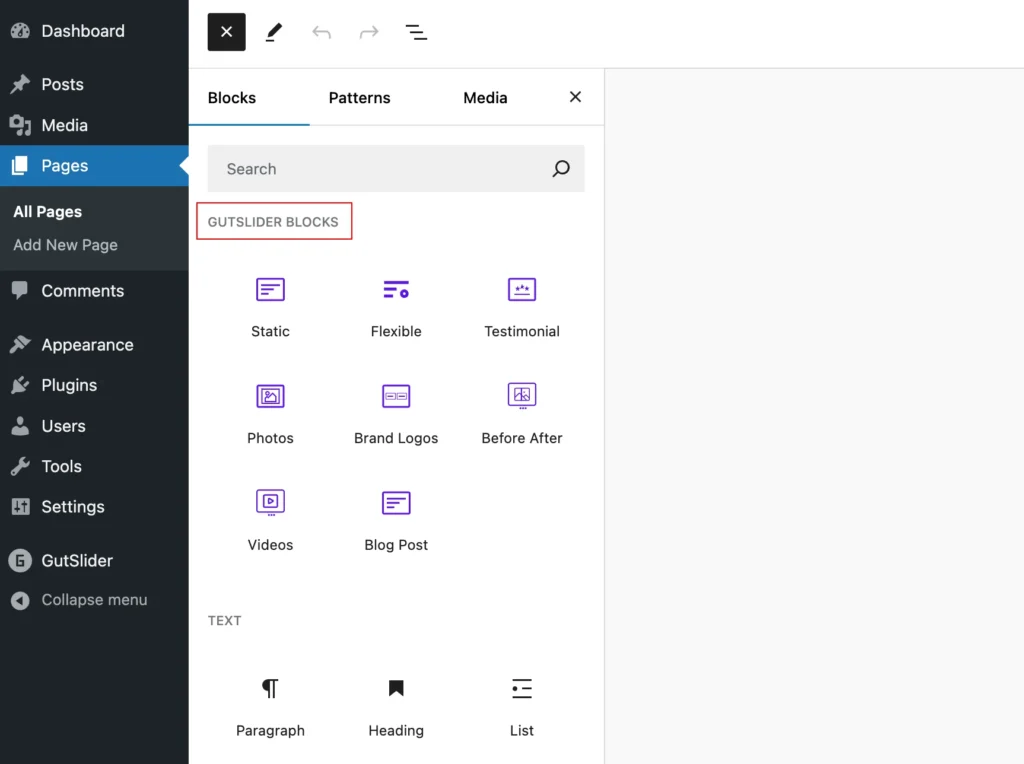
Look at the below screenshot, where GutSlider all blocks are organized under a custom category.

Moreover, it allows you to tailor the editor to your needs, ensuring that the most relevant blocks are always at your fingertips.
Create Custom Category for Blocks
We’ll dive into the steps required to create your custom category. This process involves a few lines of code and some basic knowledge of WordPress development. However, don’t worry if you’re not a coding expert; we’ll break it down into simple, easy-to-follow steps. By the end of this guide, you’ll have a new block category set up and ready to use in your Gutenberg editor.
Step-1: Registration
First, you’ll need to register your block category. Add the following code to your theme’s functions.php file or a custom plugin:
function my_custom_block_category( $categories, $post ) {
    return array_merge(
        $categories,
        array(
            array(
                'slug'  => 'my-custom-category',
                'title' => __( 'My Custom Category', 'text-domain' ),
                'icon'  => 'wordpress',
            ),
        )
    );
}
add_filter( 'block_categories_all', 'my_custom_block_category', 10, 2 );
Step 2: Create a Custom Block
Next, you must create a custom block and assign it to your new category. Here’s an example of how to register a custom block in JavaScript:
wp.blocks.registerBlockType('my-plugin/my-custom-block', {
    title: 'My Custom Block',
    category: 'my-custom-category', // Assign to your custom category
    icon: 'smiley',
    edit: function() {
        return wp.element.createElement(
            'p',
            null,
            'Hello, World!'
        );
    },
    save: function() {
        return wp.element.createElement(
            'p',
            null,
            'Hello, World!'
        );
    },
});
Step 3: Test the Custom Category
Finally, go to your Gutenberg editor and check if your custom category appears in the block inserter. You should see “My Custom Category” with your custom block inside it.
Conclusion
By following these steps, you can easily create and manage a custom category for your blocks in Gutenberg, making your WordPress editing experience more organized and efficient. Happy coding! 🚀

